Taking Screenshots on Windows 11 comes in handy in many situations. Such as if you would like to save something from the screen, send data to diagnose a problem, take a snap from a document, or simply want to send an image of your screen to someone.
So to take a Screenshot on Windows there are multiple ways to do it. We have listed various ways to help you in learning how to take Screenshots on Windows 11, for a specific region or an entire screen.
Different Ways To Take Screenshots on Windows 11 –
#1: Using Snipping Tool –
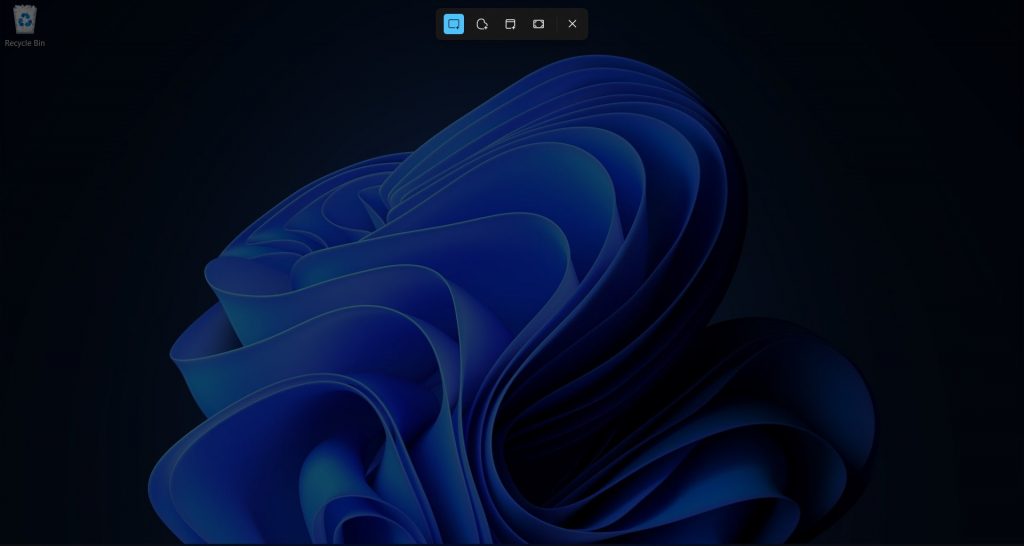
Snipping Tool is a built-in utility provided by Windows 11 to take screenshots of a specific window or just a part of the screen or a specific shape of a region and the entire screen. You can access the Snipping Tool in many ways, the quickest way is by pressing Shift + Windows Logo Key + S.
It will open up a set of icons on top of the screen as shown below. The set of icons lets you select which type of screenshot you want to take, like A Rectangular Snip icon to take a screenshot of a specific section of screen in a rectangle shape, A Freeform Snip Icon to take a screenshot of a region of any shape, A Window Snip to take screenshot of a window, and finally A Full-Screen Snip to capture an entire screen.
You can also open the Snipping application from the Search Window on the taskbar by searching for it and also Scroll it from the All Apps tray.
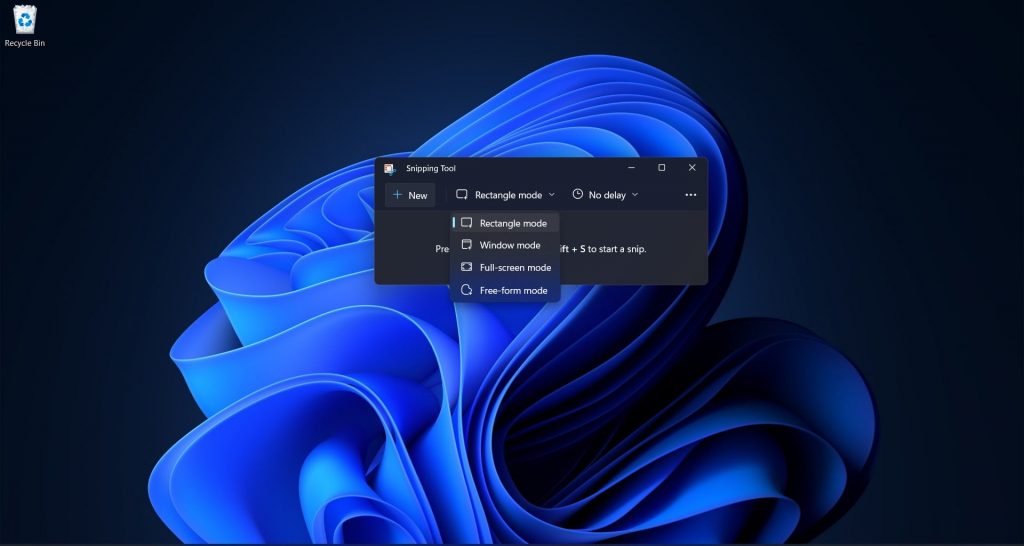
The complete Snipping Application will look as shown below with Options to select various modes such as Rectangle mode, Window mode, Full-screen mode, and Free-from mode.
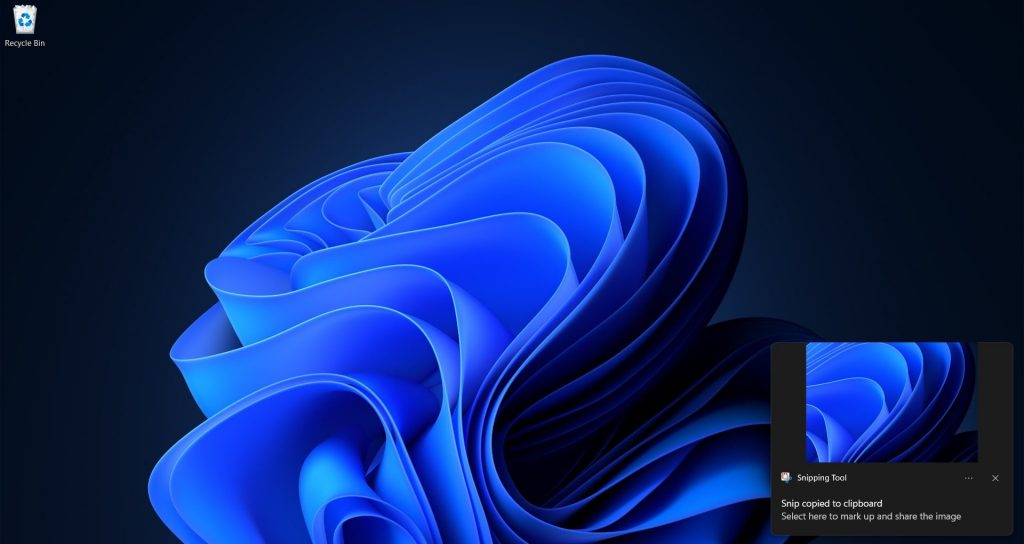
After taking a particular screenshot, at the bottom right corner a thumbnail will appear for a few seconds.
Click on the thumbnail to open a snipping editing tool with various options to edit the image. All the screenshots are saved in the Picture > Screenshots folder for you to view and share later.
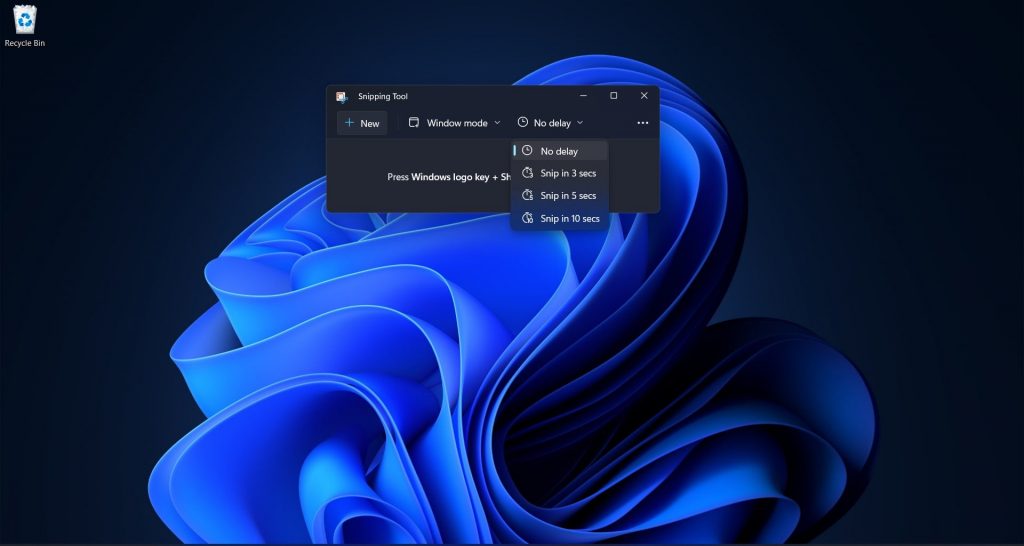
With the Snipping tool you can also set the delay period to take a screenshot by accessing it as shown below, the delay limits are in 3 secs, 5 secs and 10 secs.
You can also tweak a few features by going to the Settings tab from 3 dots visible on the top right corner of the Snipping app.
#2: Using PrintScreen Key –
If you don’t want to use the Snipping tool and want to capture the entire screen quickly on Windows 11. You can do so by pressing Windows Logo Key + PrintScreen Key (prt sc) at the same time to capture.
The screenshot image file in the PNG file format will be auto-saved on the screenshots folder, which you can access from File Explorer, Pictures > Screenshots.
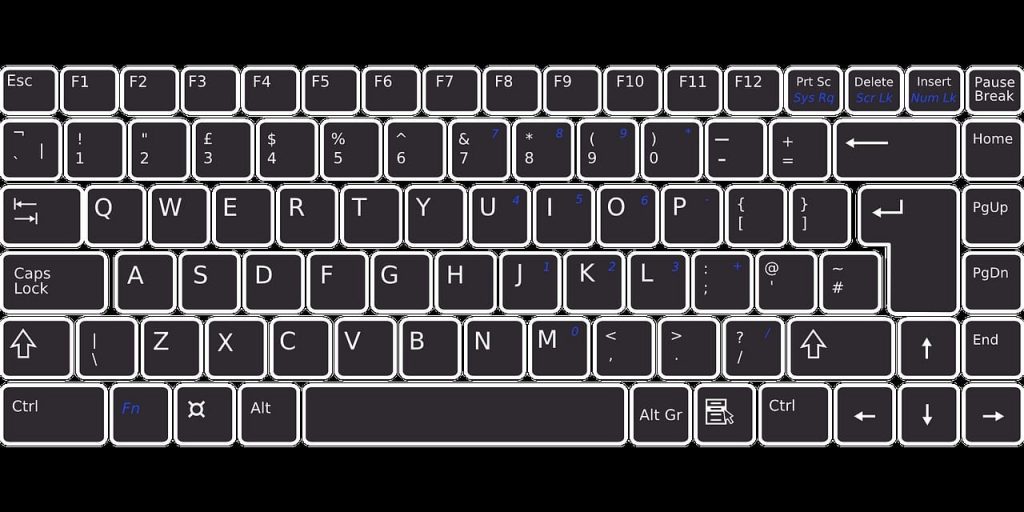
The legacy way of taking screenshots of the entire screen across Windows versions has always been by pressing PrintScreen Key. It will copy the screenshot into clipboard, then later you can paste the same on a document or email or paint to save.
#3: Using Xbox Game Bar –
Another alternative way to take screenshots on Windows 11 is through Xbox Game Bar. It was basically designed for gamers to record screens and create videos while playing games.
But you can easily use it to take screenshots and as an inbuilt tool for screen recordings as well. You can access Xbox Game Bar by pressing Windows Logo Key + G on the keyboard and then the entire Game Bar with multiple options will open on the screen as shown below.
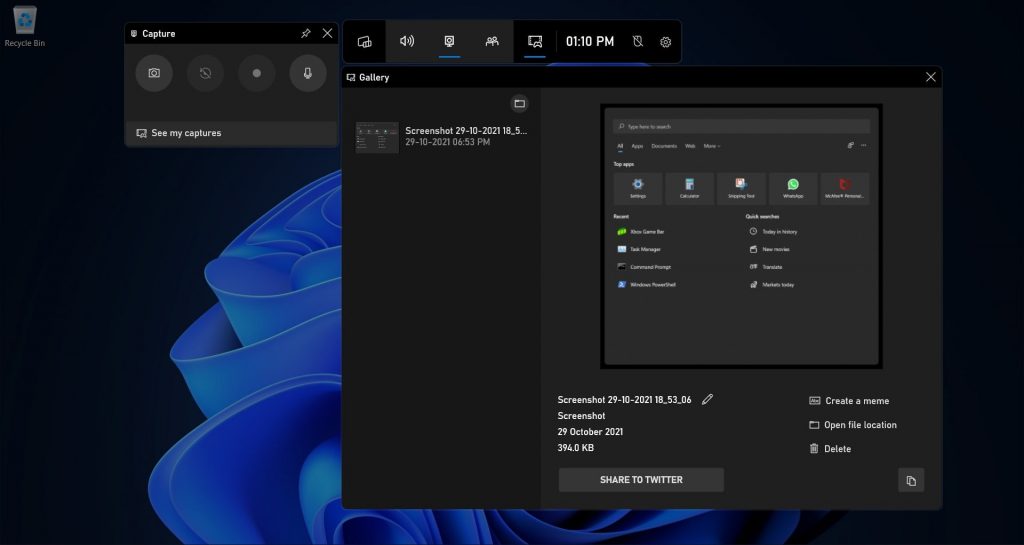
Among the various tools, look for one labeled Capture with options for screenshots and recordings. Here in the Capture toolbar, you can see options to take a screenshot, record the last 30 sec, start recording and turn the mic on or off while recording.
To take a simple screenshot just click on the Camera Icon on the left and it will take a screenshot of the window and save the image in the screenshots folder. This is how to take screenshots on Windows 11 using the best-inbuilt tool.
Important Note: Xbox Game Bar screenshot and recording does not work for Windows Desktop and File Explorer.
#4: Using Third-Party Tool –
Although you can take screenshots for free using builtin tools like Snipping and PrintScreen on a Windows 11, they won’t give you much of options or features with respect to editing and sharing abilities. There are plenty of third party applications available for Windows to take screenshots, to screen recording, scrolling capture and extensive editing options.
We would recommend Snagit, an All-in-One Screen Capture and Recording Software. It is an excellent third party tool for its plethora of feature list and efficient editing options. Let’s learn a bit more about how to take screenshot on Windows 11 using Snagit.
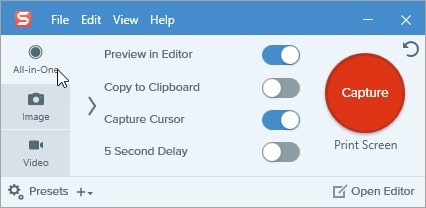
With Snagit you can take the following screen captures : Capture an Image,Capture a Window, Capture a Scrolling Area, Record a Video, Camera with audio. And later can edit for various options like Library, Create image from template, create video from images, Annotate, edit, enhance image, Share, Image effects, etc.
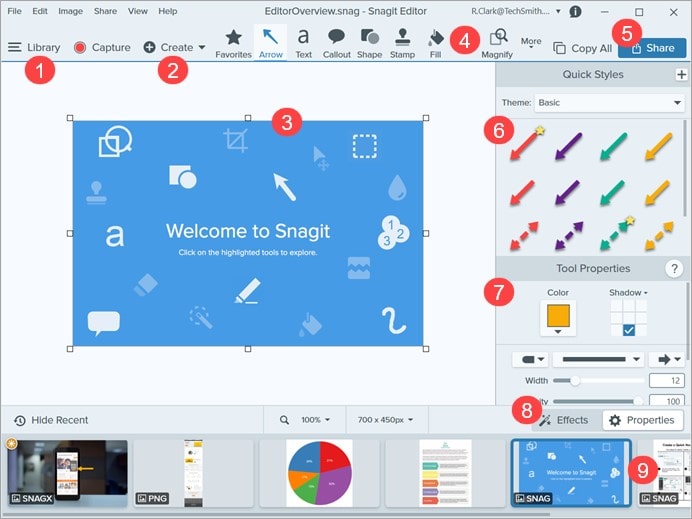
Snagit is much more than just a Screenshot tool for Windows 11, you can do much more things from it and share it across. If you are looking for something more than just taking a screenshot or record screen, look no further than Snagit to fulfil all other requirements.
Conclusion –
Taking screenshots or recording screens have become quite essential and common for various needs. There are built-in programs and free tools provided in Windows 11 to capture your screen, which do great work of screen grab and editing to share. With quick keyboard shortcuts it is a matter of seconds to take screenshots and save them to use later.
You can use both the Snipping tool and PrintScreen key to quickly take screenshots of the entire screen but to take a screenshot of a specific region of screen, only Snipping Tool works.
And also you can use Xbox Game Bar to take screenshots of windows and screen recording with audio. But for extensive editing and sharing ability we would recommend getting third party software such as Snagit.


