


Have you noticed that your Windows PC hangs or freezes quite often and the MsMpEng.exe process is the reason? MsMpEng.exe is a part of windows security previously known as windows defender, it constantly scans for threats on your PC looking for malware, viruses, spyware, and many more consuming considerable amounts of system resources thus resulting in high disk usage issues.
Worry not, we have provided easy solutions for you to try and resolve MsMpEng.exe high disk usage issue on your Windows 10 PC.
What is MsMpEng.exe on Windows 10?
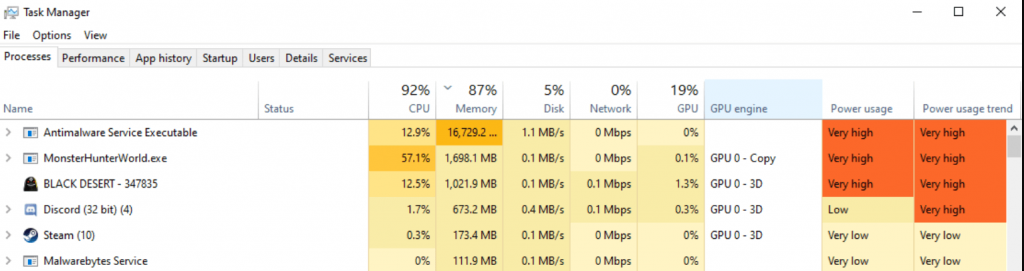
MsMpEng.exe is an Antimalware service executable that stands for Microsoft Malware Protection Engine. Basically, it is a built-in Antivirus program called windows defender previously for Windows 10 PCs.
This application constantly looks for malware, viruses, worms, harmful software and many more in the background, when anything is detected it will show a warning notification to quarantine or delete it.
Why is MsMpEng.exe high disk usage?
High Disk usage issue arises when any application is consuming 100% of the disk read and write available, it is calculated on the response time of the disk taken. Now MsMpEng.exe is an built in antivirus program which is constantly running in the background to continuously monitor your system, thus eating up a considerable amount of disk space. It is also noticed that while running complete scans on your system, windows defender also tends to scan its own folders resulting in unknown errors causing high disk usage issues.
Different methods to fix MsMpEng.exe on Windows 10 high disk usage issue –
Method 1 : Set Schedules Windows Defender Scans
A consistent periodic system scan is highly important to stay aware of threats on your PC, although Windows Defender is constantly monitoring your PC even then a persistent complete system scan helps scanning much deeper into the system. These complete system scans are very intense, and require high system resources, hence should avoid using your PC during complete system scan. That’s why you should schedule the system scans outside your working hours and periodically. Follow below steps to reschedule or schedule windows defender system scans :
- Search for ‘Task Scheduler’ in the search box on Taskbar, and Select ‘Task Scheduler’ from the search result list.
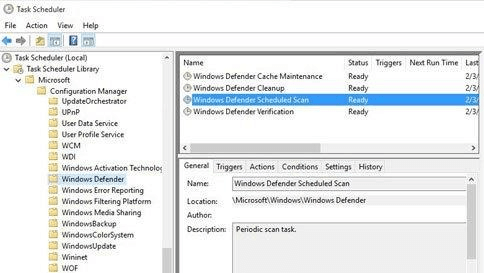
- Now follow this folder path inside Task Scheduler : Task Scheduler Library > Microsoft > Windows > Windows Defender directory.
- On the left top section, Right-Click on ‘Windows Defender Scheduled Scan’ and Select ‘Properties’ from the dropdown list.
- On the Properties window, Click on the ‘Conditions’ tab on top.
- Under the Conditions tab, disable all the conditions by unchecking them.
- Now Click on the ‘Triggers’ tab on top of the Properties window.
- Under the Triggers tab, Click on the ‘New..’ button at the bottom.
- A New Trigger window will open, here you can select a monthly or weekly option and Select the preferred Day and Time. Finally Click on ‘Ok’ to close the New Trigger window.
- Click on ‘Ok’ again to close the Properties window. And Close other windows.
This will schedule windows defender to only scan during the set day and time by you, so you will be well aware when Windows Defender would need full system resources.
Method 2 : Stop Windows Defender to Scan its own Folder
- Open Settings app on your Windows PC, Select ‘Updates and Security’ module from the list.
- Select ‘Windows Security’ from the left sidebar menu, then Click on ‘Open Windows Security’ button on the Windows Security window.
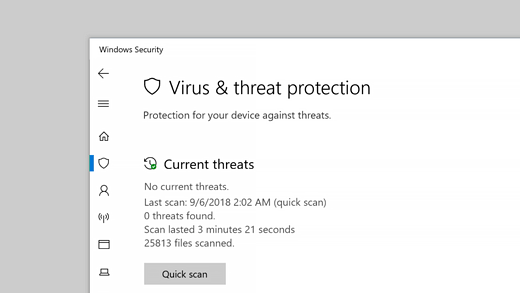
- After Windows Security App is opened, Click on ‘Virus & threat protection’ option.
- Now in the Virus & threat protection window , Click on the ‘Manage settings’ button under Virus & threat protection settings.
- Here locate Exclusion and Click on ‘Add or remove exclusions’ button.
- Then under Exclusions , Click on + Add an exclusion button to Select ‘Folder’ from the dropdown list.
- Now copy & paste this file path : ‘C:\Program Files\Windows Defender’ at the bottom of the folder path and Click on the ‘Select Folder’ button.
- When prompted to confirm your action, Click on the ‘Yes’ button. Finally you can find that the folder to Windows Defender has been added to the exclusion list.
This will stop windows defender from scanning its own folders anymore, and might stop MsMpEng.exe to consume high disk usage.
Method 3 : Disable Sample Submission
While sending crucial data about potential threats identified to Microsoft for further analysis is all well and good, it does tend to consume quite a lot of system resources while doing so. So sometimes users have noticed that MsMpEng.exe is using a higher disk when the sample submission feature of windows defender is on. Follow the below steps to disable sample submission :
- Open Settings app on your Windows PC, Select ‘Updates and Security’ module from the list.
- Select ‘Windows Security’ from the left sidebar menu, then Click on ‘Open Windows Security’ button on the Windows Security window.
- After Windows Security App is opened, Click on ‘Virus & threat protection’ option.
- Now in the Virus & threat protection window , Click on the ‘Manage settings’ button under Virus & threat protection settings.
- Here scroll down to locate Automatic sample submission and Click on Disable button to Turn it off.
This will reduce high disk usage issues from MsMpEng.exe when it is no longer sending samples for analysis.
Method 4 : Stop Windows Defender using Group Policy Editor
- Press Windows key + R to open the Run window on your PC and enter gpedit.msc into the dialog box and Press Enter or Click on ‘Ok’.
- When the Group Policy Editor window opens, follow this folder path : Computer Configuration > Administrative Templates > Windows Components > Windows Defender Antivirus > Real-time Protection.
- Now Double-Click on the ‘Turn off real-time protection’ entry from the list on right.
- A new Turn off Windows Defender Antivirus window opens now, Here select the Enabled option. And Click on the ‘Apply’ button at the bottom. Later Click on the ‘Ok’ button to finish the process.
This process will stop the real-time protection from windows defender and stop MsMpEng.exe high disk usage issue.
Method 5: Include Antimalware Service Executable to the Exclusion list
It so happens that, when Windows Defender security scans complete systems for threats including the Antimalware Service Executable process, then it tries to determine whether the process is a threat or not by taking up high system resources like high disk usage.
So it is advised to exclude these processes from scanning to prevent unwanted errors and lags.
- Open Settings app on your Windows PC, Select ‘Updates and Security’ module from the list.
- Select ‘Windows Security’ from the left sidebar menu, then Click on ‘Open Windows Security’ button on the Windows Security window.
- After Windows Security App is opened, Click on ‘Virus & threat protection’ option.
- Now in the Virus & threat protection window , Click on the ‘Manage settings’ button under Virus & threat protection settings.
- Here locate Exclusion and Click on ‘Add or remove exclusions’ button.
- Then under Exclusions , Click on + Add an exclusion button to Select ‘Process’ from the dropdown list.
Now enter the executable file name: MsMpEng.exe and Click on Ok.
This will stop windows defender from scanning Antimalware Service Executable and hopefully stop high disk usage issues.
Conclusion –
Windows Defender is a built-in Antivirus Protection in Windows 10 to Scan and Monitor your PC for any threats. Often while scanning or real-time monitoring might result in taking up a significant amount of system resources, thus your system becomes laggy and unresponsive.
Follow the above given methods to solve MsMpEng.exe hogging your system resources while you want to run intensive applications, and resolve MsMpEng.exe high disk usage.