

Looking for how to take screenshots on a dell laptop on windows 10? Well, it is as easy as pressing the key. Scroll Down the blog to Check how to capture screenshots on windows
How To Screenshot On Dell Laptop
In windows 10 there is an inbuilt feature to take screenshots i.e. Print screen key. On Your Dell Laptop, you will find the print screen key next to the functions key. Generally, These Keys are labeled as PrntScrn, PrntScr, PrtScn, PrtScr, and PrtSc on your Keyboard.
A. If you want to save it to the clipboard
If you want to just capture the current screen on the clipboard. Just Click Print Screen Key, After this, the current screen will be captured and saved on your clipboard. Now you can share this picture to your friends by CTRL+V.
If you want to save or edit this image you have to paste it to any image editor(Paint or Photoshop) and then save it to edit.

B. Want to Save Screenshot as PNG File Automatically
To save your screenshot image on your device just press the Window+ Print Screen button. Here You See the Screen Flicker and Now You screenshot has been saved on your device on the given path.
C. Capture a Screenshot of a Specific Window
If you have opened multiple windows on your dell laptop and want to capture a specific window then Press the Alt+Print Screen key combination to the screen which you want to capture. After Pressing the key the captured image will be saved to your clipboard for future purposes.
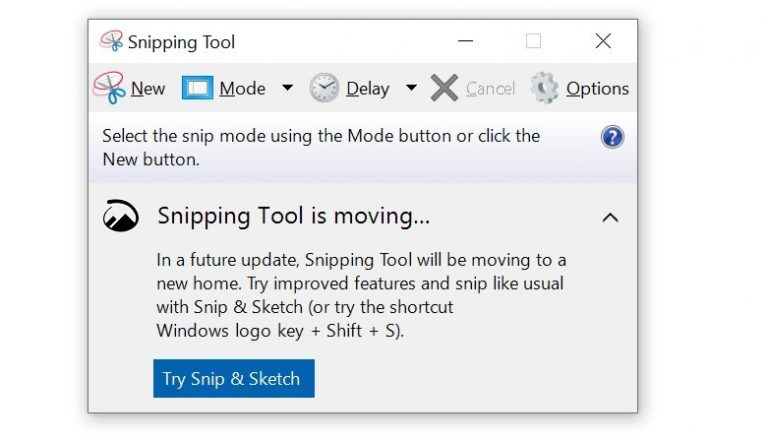
D. Want to Take Screenshot of Specific Area in Dell Laptop
Taking a Specific area screenshot on your dell laptop is also an easy task for you. Window Provide a pre-installed Snipping tool in your dell laptop. With this you can capture screenshots of any shape in your dell laptop.
Follow Below Steps:
- Search Sniiping Tool in your windows search bar and check the relevant results.
- when you click on the Snipping Tool, you will see a lot of option.
- Click on New button and Choose options from Free Form Snip, Windows Snip, and Full-Screen Snip.
- After Selecting the area, to save this image, Press CTRL+S and put a relevant name and click save.
Bottom Line
Hope you find this blog useful and that you are able to screen captures on your Dell machine. Let us know in the comment which way you find it easy and handy on your device.